Monday, April 28, 2014

Deals and Steals: Jordana Products, Good or Bad?


I've heard about these two Jordana products on Youtube videos for awhile now and always wondered if they even worked. 
The Best Lash Extreme Volumizing Mascara is under $4 and the FabuLiner is under $3. I bought mine at Walgreens. 
So if they work, then that is awesome because they are super decently priced and easily accessible. So to test them out I put together this makeup look and wore it in a hot kitchen serving soup. No, really that is what I did. And then the next day to the salon all day running around doing peoples hair.


Lets start with the mascara. The wand is very firm and doesn't have much give to it. While I was putting it on I felt like it was pulling my eyelashes a bit, which I do NOT like. 


I did two coats and my lashes looked decent. A good amount of length a good amount of volume and they were very black. But when I went in for a third coat I regretted it right away. My lashes became clumpy. NOOOO!!
Also, I could FEEL this on my lashes, it wasn't like my holy grail Too Faced Better Then Sex Mascara that feels like nothing on your lashes. Even throughout the day it felt hard on my lashes and I like them to be soft and fluffy. My husband who hardly ever comments on my makeup asked my why my lashes were so clumpy so that is not a good sign. 
I found when I went to remove this mascara it didn't want to come off very nicely and you know how you can get that leftover mascara in your eyes the next morning? That happened every time I wore this. Even when I thought I had washed it all off!


Those things are the cons of this mascara. There are pros also! I did try just two coats another day and liked how it came out better. The clumps were avoided and there was no smudging or flaking throughout the day. And its under five bucks at the drugstore. Can't beat that! I would say this is a good one for every day use for someone who wants their lashes just a bit better but isn't looking for crazy volume or length. I give it 3.5 stars out of 5. I just totally made up those points I don't have a points system or anything like that.


Now the liner. My favorite liner ever is the Maybelline one that I have a whole post raving about. This one is a felt tip one as well AND its about half the price of the Maybelline one. The tip is a bit thicker and not as soft as my Maybelline liner so when I first looked at it I got a bit worried.


There was no reason to be worried. It still created a nice thin line where I wanted it too. It was super black, didn't smudge and lasted all day. This liner gets a HUGE thumbs up from me. I do like the Maybelline one better still because I feel its slightly easier to work with and I like how it is softer but this one is right up there as far as top eyeliners go.


All in all these are two products that are going to stay in my makeup bag. And two huge steals as far as the price goes. Next time you're at Walgreens pick them both up for under ten bucks and let me know how they work for you!


Friday, April 25, 2014

HairDon'ts: For Your Hair Health


Since I'm a hairdresser I talk to people all the time about their hair and one thing I am constantly being amazed at is the fact that people do not know how to take care of their hair. I can't tell you how many times I've told a girl something she should or shouldn't do to her hair and she's acted surprised. In my head these things are common knowledge but clearly the world needs help when it comes to hair care. So here is a list of the top ten things NOT to do to your poor hair.


  • 1. Don't brush your hair when it's wet! Never ever. Hair is at its most fragile state when its wet so if you're tearing a brush through it all you're doing is breaking it and making it weak. Instead use a wide tooth comb and start at the bottom, working your way up to get rid of the tangles. 

  • 2. Do not put your hair up when its wet. This goes right along with the fact that its fragile so if you're pulling it up into a ponytail or braiding it very tightly its going to break off. Especially if you do it all the time. I mean once in awhile in an emergency is fine (I won't be the hair police and show up at your door and yell at you(or will I?)) but don't make a habit of it. 

  • 3. NEVER heat style your hair without first using a heat protectant. If you are blow drying or flat ironing or curling your hair and you don't put anything in it to protect it all that heat is going directly onto your hair and frying it. Putting a heat protectant on first is going to protect it from the heat. (obviously) 

  • 4. Don't skip the conditioner. For some reason people think that if they use a really good shampoo they don't need conditioner. I have no idea where this idea came from but its just crazy. Shampoo strips your hair, conditioner puts the moisture back into it. If you are only stripping your hair and never conditioning it what do you think is going to happen?! Even if you have very fine hair use a small amount of conditioner.

  • 5. And along with number 4- keep that conditioner away from your scalp! Start at the ends of your hair always. Think about it, those ends have been around a whole lot longer then the roots of your hair. The roots are always getting natural oils and are fresh because they are the new growth. The ends are missing the oils produced by your scalp and have been abused by your hot tools, the sun and possibly bleach or hair color. They need to be helped out, so when you apply your conditioner start at the ends and then whatever is leftover in your hands add to the roots. Skip putting any on your roots if you have fine hair or if you get oily easily. Let the conditioner sit in your hair for at least five minutes before you rinse it out. It needs time to work its magic. If you have very long hair comb it through with a wide tooth comb, if its short your fingers will work fine.

  • 6. Washing every day is NOT needed! Remember what I said about those natural oils? Your hair needs that to be healthy. If you are constantly stripping away those oils your hair will be very sad and not as healthy as it could be. If you HAVE to wash every day make sure you are using a very gentle shampoo that is made to be used daily.

  • 7.  Don't think you need to spend tons of money on expensive products! Some drugstore products are amazing and natural products are awesome too. I love using unrefined coconut oil as a hair mask and I have a friend who washes her hair with baking soda and rinses with apple cider vinegar and her hair looks great! My Mom actually does that as well. I love the smell of my shampoo too much to ever go that route but expensive doesn't always mean better. I've tried many high end shampoos and not to many of them live up to their claims. One brand I do think is worth shelling out a bit more cash for is the Moroccan Oil brand. Everything by them is amazing. 

  • 8. Keep away from sulfates when you have color in your hair! Sulfates are what makes shampoo suds up and many companies are now realizing it also strips color from your hair. If you're paying for your hair color pay a little extra for a shampoo that won't destroy it.

  • 9. Try not to heat style every day. Every couple weeks I try to give my hair a break and I don't blow dry it, curl it or flat iron it for a whole week. These are the days I experiment with wearing it up or I try to work with my hairs natural texture. Even when I do heat style I try to wait as long as I can and let it air dry before blow drying it. Less heat=less breakage and split ends.

  • 10. Don't always fight your hairs natural texture! If its curly, figure out a way to wear it where you like the curls. If its straight experiment with how it best looks straight. If its wavy try out different products that will make those waves look awesome. Don't get me wrong, I love flat ironing my hair to make it super sleek or doing big voluminous curls BUT I also know how to work with the natural waves I have.  So many girls tell me they hate their super straight hair and the same number of girls tell me they hate their curls. I think its important to figure out how to love your hair just how it is and the more you can wear it naturally the healthier it will be because you're not using heat on it daily.


Not everyone's hair is the same but I think most people can benefit from these tips! Any of them you've never heard before? Any of them you disagree with? Let me know in the comments down below!


Tuesday, April 22, 2014

Scents to Love: Clean Rollerball Collection

Clean Mini Rollerball Collection.
 ($18) 
Sephora

A collection of five of the cutest little rollerballs! I like this idea because you get to test out five different scents but its not those tiny samples (those things annoy me). There are large enough that I'll get quite a few uses out of each one to figure out how long they last and which one I like the best (although I think I already know).

Clean Fresh Laundry – I opened this one first and it wasn’t a rollerball! I was so confused so I opened another one and it was a rollerball (whew) I guess this one just had a little problem. I think the rollerball part got stuck inside the cap. 
Oh well, it still works. Definitely a “fresh” scent.  It smells like spring to me. Clean and fresh. I don’t know where they got the laundry part from but I sure WISH my laundry smelled like this.

Clean Rain-  Rain is a PERFECT description for this. It has a little bit of a woodsy smell compared to the others. Still so light and fresh but not so light that it disappears. I love this one.

Clean Shower Fresh- Out of all the them is this my least favorite. Its not a bad smell. Its just not a “oh my word this smells amazing” smell. I guess Shower Fresh is a good name for it because that’s all it smells like, something clean and fresh. But again, very light.

Clean Warm Cotton- Ok, this smells like a laundry room. With a hint of something sweet. Not my favorite one, but I’ll still use it. Actually I just decided this one and Shower Fresh tie for my least favorite. Not that they are BAD just not great.

Clean Skin- LOVE LOVE LOVE! I smelled this one first in the store when I spotted this set. I had been wanting to smell it ever since I heard Jaclyn Hill rave about it. I think her and I have similar "scent taste". 
Last year she was going on and on about Marc Jacobs Daisy Sunshine and I bought it and ADORED it. It was my summer scent.The bottle is half gone already!
Anyways, so I smelled it and it took me back to my Hollister and Abrecrombie days. I had a perfume back then from one of those stores that I wore til it was gone. You know how a scent can just take you to another time? That’s what happened in the Sephora store for me as soon as I smelled it. I was so torn between the rollerball of this scent ($20) the full sized ($38) or getting this set ($18).
 I finally decided on this set (duh). As far as describing this scent?  Its just so girly and fresh and summery and all around wonderful. It has a bit of warmth to it, some kind of vanilla maybe? Its my new favorite scent and it might just be my summer perfume this year!

This set was worth it for me just to try out the Clean Skin Rollerball but I'm liking the variety that the whole set brings. A win of a purchase.

Thursday, April 17, 2014

HairDo's: How To Do the Hippie Braid


I saw a picture of this braid and loved it right away! I knew I had to try it on myself and it was easier then I thought it would be! The first day I wore this I had a girl stop me at Ulta and ask me how I did it cuz she loved it so much. 
This style does work better on curly or wavy hair, I did it with my hair straight a different time and while I did like it, I didn't love it as much. 


I started with second day hair, I think it had been up in a bun the day before so there was plenty of texture to work with. I used a bit of dry shampoo in my roots to get rid of the oil and to keep things in place. 


Next, create an inside out french braid starting at the top of the head and grabbing pieces from both the top and bottom to create the braid. I did this another time just taking pieces from the top and it didn't hold nearly as well. Braid it a bit past your ear and then whatever you have left just regular braid it down and tie it with an elastic. Keep everything as tight to the head as possible and follow the curve of your head toward the back. Then, after its secure pull at the braid making it looser and wider.I just found out this is called "pancaking" the braid. I have no idea why. 


Repeat on the other side, try to take about the same amount of hair so the braids will be fairly even. Now, don't tie this one off, instead bring it around to the back of your head and pin it as close to the other braid as you can. If you have short hair like me, this will be a stretch, but if your hair is long then only braid it long enough to be able to pin it under the other braid. Then let the rest fall in with your hair. Make sure you "pancake" this one too, just pull at each strand of the braid to create texture and fullness.


See how the tail just kind of falls, the pins are crisscrossed and you can tell where I stopped grabbing hair from either side and just braided regularly.


Next take the other braid and cross it over the one you already pinned and tucking it into where you stopped french braiding. Look closely at the picture down there, you'll be able to see where I tucked this one in. Pin it, crisscrossing the pins again. Pancake once again, pulling gently to widen the braid. Pin anywhere else that needs it and you've got yourself the hippie braid. What I love those most about this is it looks like you just tied your hair together somehow cuz all the pins are hidden and it lasted me ALL DAY the three times I've done it.
Send me a pic if you give it a try.


For those of you with longer hair, I LOVE this girls beauty blog and she did this exact look (only she called it the wrap around braid) Check out her version for some extra help : http://blog.hairandmakeupbysteph.com/2013/10/how-to-wrap-around-braid.html

Monday, April 14, 2014

Styles for the Busy Girl: How To Do Your Makeup in 10 Minutes

Back when I still lived at home I would watch the show What Not To Wear with my Mom and little sister. The makeup artist on the show would tell women how to do their makeup in a super fast way because they all complained they didn't have enough time. 
I will never forget the day that my little sister asked me to do my "ten minute face" because she wanted me to hurry up and come play with her. I think she was maybe eight or so at the time. (that's you Julie!) 

This is the look I go to when I don't feel like doing my makeup, or I literally only have ten minutes and I have to be out the door. I also like it on days that I'm going for the "no-makeup" look. I want everything to look polished and pretty but not like I'm wearing a full face of makeup. I timed myself when I was doing this and it took me EXACTLY 20 minutes and that was including stopping at every step to take pictures. So I am pretty positive it would be super easy to do in ten minutes or less.

Let's start with the finished look first. 
See, how it looks like I just have great skin and bright eyes naturally? Its all an illusion ;)


Here are of the all the products being used today. Most of them can be found in my "Top Ten" list of makeup that every girl needs. As always start off by priming those eyes! We are only going to be using three shadows but we want those shadows to last all day long. 
Next, using a fluffy crease brush apply a shadow that is one or two shades darker then your skin tone into your crease. This will give you just a bit of depth to your eye but it won't be anything dramatic. I'm using "Buck" from the Naked palette.
See how its just a bit darker? The beauty of using a color like this is that you don't need to blend like crazy, just put it on there, blend it out a tiny bit, and that's it. Super fast.

Next take a light shimmery color and apply it to the rest of the lid with a flat shader brush. I'm using the color "Sin".

 Then add a brown eyeliner into the lash line. Just smudge it in there, you don't have to do anything precise. This makes your lashes look thicker and your eyes look more awake but is faster and more natural then using black.


Next up, two coats of your favorite mascara. I always do two coats even if I'm in a hurry because I like really full black lashes.


That's it for the eyes, now lets focus on the face. I always do my eyes first in case there is any fallout from the shadows or I mess up my mascara. That way I can fix it without messing up my entire face.Doing your makeup in the same order every time will be the fastest because you will just kind of automatically do it and not even have to think. 


Got to cover up those "blemishes". I'm using my Nars Creamy Concealer. I love this one because it has great coverage as well as an awesome applicator. I apply it to my face and then blend it out with my fingers.
Now, apply a lightweight foundation all over your face. Today I'm using the Bare Minerals Original
Foundation which I really like for a more natural look.


After that its onto the eyebrows. DON'T SKIP THIS STEP! It makes a world of difference. Check out my eyebrow post for more details on this step. Now lets add some blush. This is one of my all time favorite blushes. Its the Milani Baked Blush in Luminoso. It has great pigmentation, is a beautiful peachy color and gives an amazing glow to the skin. And its from the drugstore so its around $8. A steal!


Of course its important to make weird faces as you apply it. Its so strange trying to take pictures of yourself while applying makeup....ANYWAYS. Add a coat of mascara to the bottom lashes, and a bit of a highlight to your brow bone.


The very last thing (which you can even do in the car if you're REALLY late) is to throw on a light colored lip gloss. You don't want to be messing around with a dark color or even lipstick if you're rushing, lip gloss is very forgiving if you miss a spot or apply a bit too much.


And there ya have it! Ten minutes and a more polished version of yourself!


Monday, April 7, 2014

Newbies: Makeup Goodies, My Thoughts on Some Brand New Products


One of my favorite things to do is try out new products! There are always so many claims that products make and most of the time they are not all the way true. Not to mention the price! I don't mind paying a bit more if the product really does what it says, but if its costing me an arm and leg and then it doesn't work that is a different story. I love buying from places like Ulta and Sephora because they have awesome return policies so I feel safe that if I don't like something, it can go back without a problem. So lets take a look at some of the new products that I've picked up over the past month or so.


This is a brand new just released palette from Too Faced. I love many of their products and ALWAYS love the packaging, so cute! I saw this display at my Ulta and thought it would be perfect for summer. Its the "A La Mode Eyes" Palette and it comes in an adorable little magnetic tin.

Here are the colors swatched on my hand. I was draw to the bright pink color and I also liked all the neutral choices including that beautiful copper color. 


This is kind of random but most of Too Faced eyeshadow palettes come with an eye chart that will show you different looks you can try. Is it just me or are these eyes the creepiest things ever?!
Anyways, I wanted to love this palette, I really did but I found the colors not very pigmented, not long wearing and didn't transfer to the eyes true to the colors in the pan. When I got home I discovered that I had many other colors very similar and BETTER in my collection and experienced a lot of fallout with the shadows. And at THIRTY-SIX dollars I expected these shadows to rock my world. They failed completely so back to Ulta they went.


There was a special running at Ulta that day where if you spent more then 25$ on Too Faced products you got this "Reality Star Favorites" set for free. It came with the "Better Then Sex" mascara (scandalous!) and the "Shadow Insurance" Primer. This is one of the reasons I love Ulta, they are always running sales and free products. Although the eyeshadow palette was a total fail these products are AWESOME. I have tried both of them before and was super happy to get these mini sizes for free. An eye primer is a must and this mascara is my top favorite (except for the fact that it smears under my eyes, I can't figure out how to make it stop doing that! But it gives me volume, length and beautiful lashes so I can deal with fixing it throughout the day)


I've been on the hunt for a great daytime and night moisturizer and decided to try these two guys out. I'm feeling like my skin needs a little help with anti aging since I'm almost 30. Ok, I'm not really....I'll be 27 next week but still, your late 20s is when you need to start preventing those wrinkles.
 I LOVE this Neutrogena Healthy Skin Anti-Wrinkle Night cream ($14.99). As you can see I've already used the top part. I like the tube it comes it, its kinda like a toothpaste tube and you can fold it down as you go. It leaves my skin super soft and hydrated. I use the after cleansing my face every night and so far so good! 
However, on the other end, this Mario Badescu Buttermilk Moisturizer that I wanted to use during the day is no good for me. It actually made my skin burn! Not how you want your skin to feel when you're trying to moisturize! And since this was $18 it had to go back.


Lastly, a Sephora find! I'm not sure if this a new product, I'm pretty sure it isn't. I think it was put in a different place in the store and so it caught my eye. Tricky, tricky Sephora. This is the Buxom Full On Lip Cream in Purple Haze. ($19) (Such a fancy name, they can't just call it lip gloss?)


I almost didn't get this because I don't like tingling lip glosses but the color was just so pretty and unlike anything I have I decided to try it on my lips and once I did I was sold! I had some store credit from some other things I had returned that I wasn't using so that's how I justified the hefty price tag. I also love the packaging of this product with the frosted glass and it is a LARGE lip gloss so it will last forever.

So there we have it, some hits, some misses and a more makeup savey Sam. 


Friday, April 4, 2014

All About The Eyes: How to Do a Smokey Copper Eye Look


I just finished doing this look and my husband said to me "Your eyes look really light today, like light green." I don't really know if that is a complement or not but since he noticed that I looked different I guess I will take it as a good thing!
This eye look is going to look awesome on green eyes, on brown eyes, on blue eyes. You name it, the warm coppery shades will be flattering on them all!
I'm going to show you a LOT of different steps and products today but don't feel like you need to use them all. The finished version of this look is the over the top version, when you really want to have some fun with your eye makeup. As we go along I'll let you know what to skip for a more stable look.

First things first we gotta start with the tools of the trade. Here's what I used, as well as some ideas of what you could use if you don't have these exact things. (If you want to just skip to the actual "how-to" part of this post then scroll down.)

I used five different eye brushes from start to finish for this complete look. You could get away with two. I'll put a little star next to the ones you'll for sure need. They are listed in the order used. 
-Fluffy crease brush. *
-Flat shader brush. *
-Even fluffier crease brush
-Pencil Brush 
-just a plain old normal eyeshadow brush


The shadows! This is my custom Mac palette. It took me ages to fill it and two of the shadows aren't actually Mac shadows (not yet anyways.) Mac's eyeshadows have some of the greatest pigmentation and staying quality of any shadows I've tried. Yes, they are pricey but I say WORTH IT!

 The shades swatched on my hand from top to bottom. 
-Nylon a shimmery white {for highlighting}
-Texture a light brown with some slight shimmer {for blending}
-Espresso a darker warm brown {crease color}
-Antiqued a beautiful shimmery warm copper tone. LOVE. {all over lid color}
-Carbon a matte black {definition color}

And here they are numbered according to the order we're gonna use them in. Now if you don't have these exact shadows in your collection just look around for things similar. My favorite one and top choice for you to go out and buy would be Antiqued. I haven't found anything like it yet.


I used three different eyeliners today. Are they all needed? Not really, you could get away with just one but hey, I was experimenting.
Mac Eye Kohl in Costa Riche (A deep reddish brown)
Urban Decay 24/7 Glide On Pencil in Smog (a shimmery brown)
Urban Decay 24/7 Glide On Pencil in Demolition (a darker matte brown)


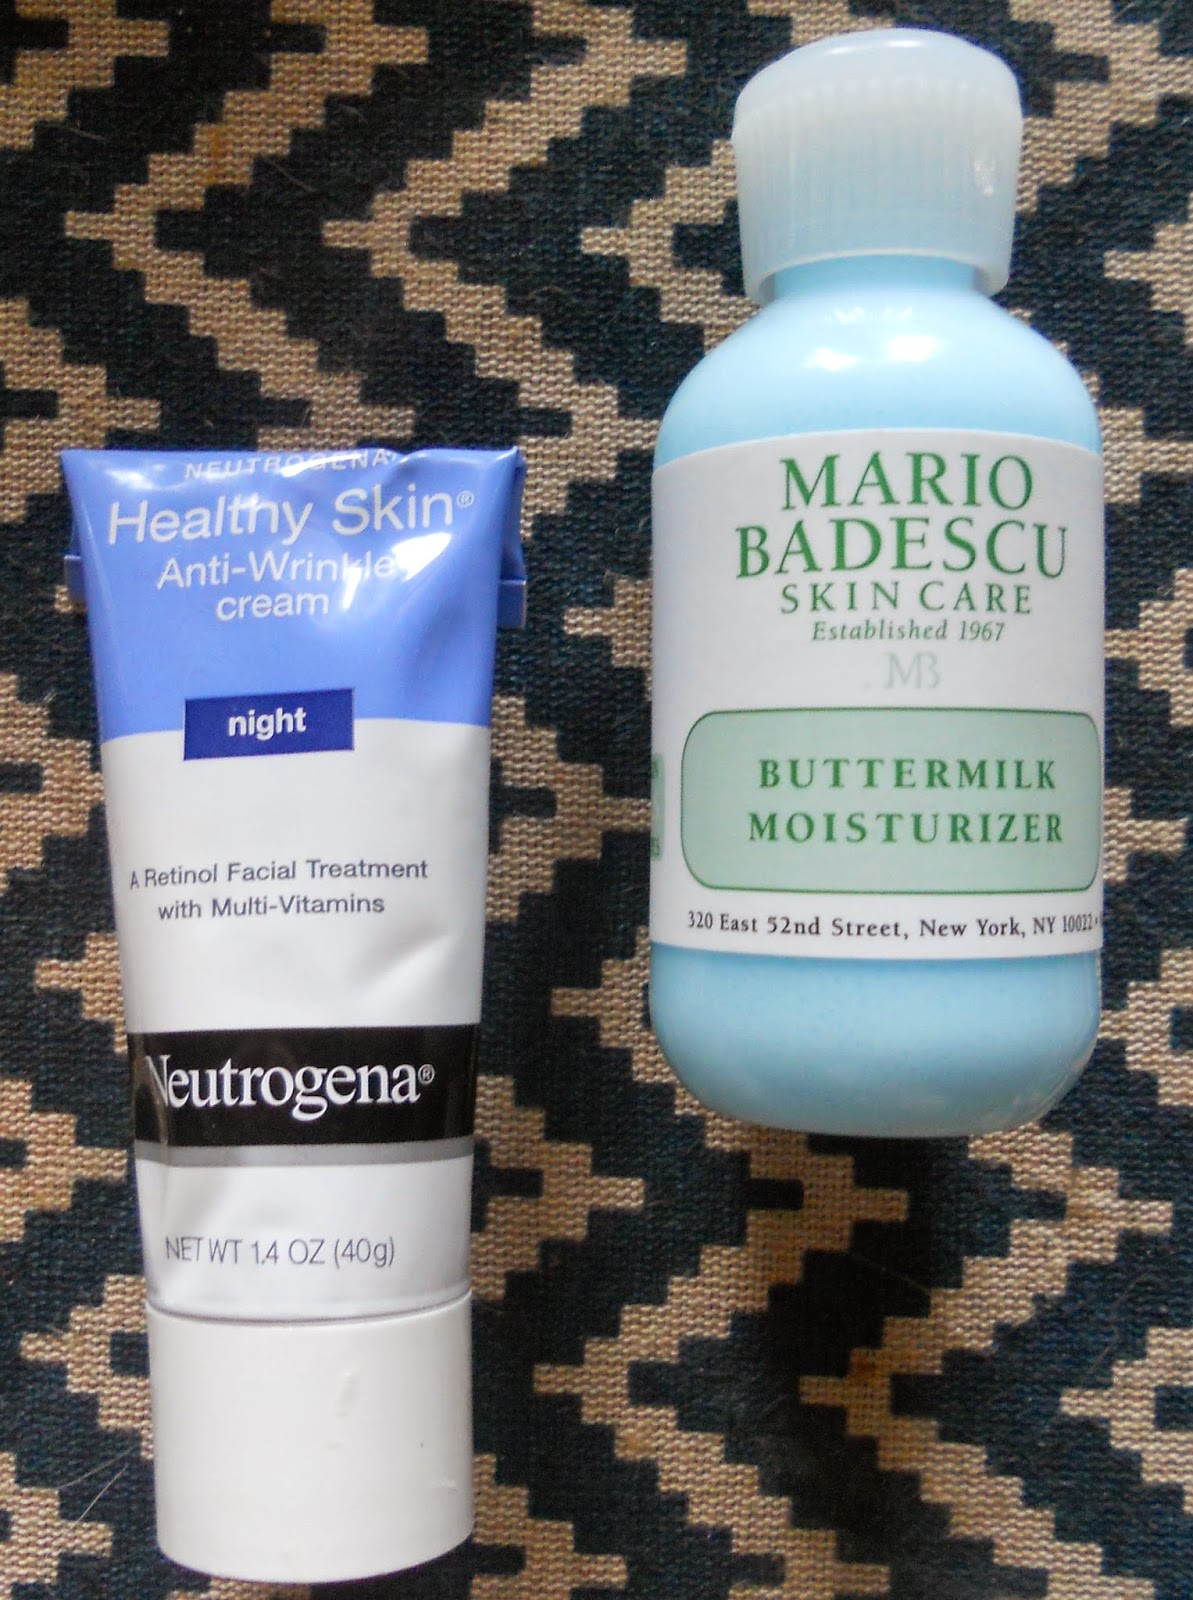
Gotta have the mascara and primer for any eye look. And these are my two current favs. Speaking of primer that's the FIRST STEP- Prime those eyes! Don't skip this step, you're gonna be working hard to create this look and you don't want it all messed up an hour later.


SECOND STEP- put the shade Expresso (matte brown) all over the crease using a fluffy crease brush.


Excuse my eyebrows. They are supposes to be growing out and of course they aren't doing it to gracefully. Anyways, a few tips when applying a darker shade to the crease. You want this to be really well blended and "blown out". A great trick is to first hold your brush close to the top of the handle and really work the color into the outer part of the crease. 


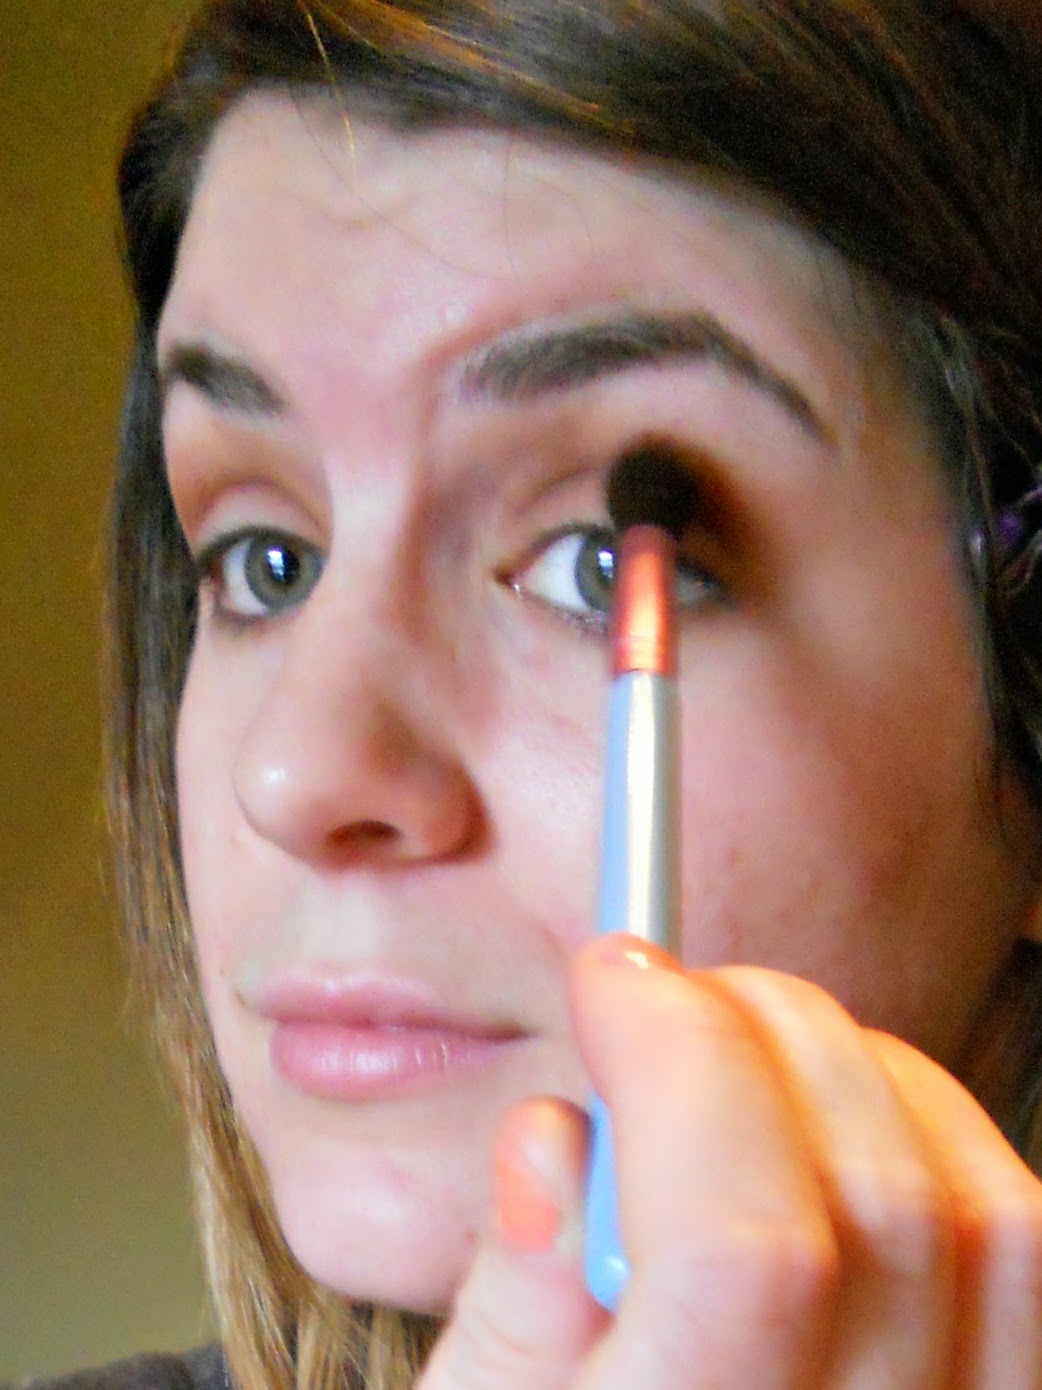
After you've worked it into the outer part, start blending it back and forth, back and forth in windshield wiper motions. I always raise my eyebrows, I feel like it gets the shadow in there better for some reason. Next, hold the bottom of the brush and keep sweeping the shadow back and forth. I always put the brush in the shadow once for each eye and tap off any excess to avoid fallout. That's whats so awesome about these shadows, a little goes a LONG way. Matte shades can be hard to work with so extra blending is key.

THIRD STEP- using the flat shader brush pick up the shade Antiqued (shimmery copper) and apply it all over the lid of the eye using patting motions. This time I will pick up the shadow a few times and really pack it on to make it really pop.


FOURTH STEP- using an even fluffier crease brush (or the same one as before, after wiping off the other shadow) take the shade Texture (light brown with some shimmer) and blend it in the crease only, back and forth back and forth to smooth everything out.


FIFTH STEP- add eyeliner in Smog (shimmery brown) right in the lashline. You can pretty much use any brown pencil liner here, it doesn't HAVE to be shimmery, I just liked how this one looked. You could also use a black liner for extra drama.


SIXTH STEP- using the eyeliner in Demolition (darker matte brown) smudge it on your lower lashline and then use the pencil brush to smoke it out a bit. Then add the dark reddish brown eyeliner to your water line (or black for an even smokier look!) Skip this step if you want a less dramatic look. 


SEVENTH STEP- use the shade Nylon (shimmery white) on your brow bone and inner corner to highlight and bring everything together. You can really use any small eyeshadow brush for this, even your fingers will work fine. 


 EIGHT STEP- Use a TINY bit of Carbon (matte black) on that same pencil brush and smudge it into the "outer v" of your eyes. This is TOTALLY not needed, all its going to do is add a bit of depth to the look.  

NINETH STEP- Blend anything that looks harsh with the fluffy crease brush and no additional product.

TENTH STEP- Add mascara and this eye look is DONE!